You will need
Fabric Width 110 cm
EU 34-44/UK 6-16/US 2-12
2.5 m
EU 46-50/UK 18-22/US 14-18
3 m
Fabric Width 140 cm
EU 34-44/UK 6-16/US 2-12
1.75 m
EU 46-50/UK 18-22/US 14-18
2.25 m
batting 0.3 m
Thread
2 buttons
Elastic 2.5 cm wide
34-38 20 cm
40-44 25 cm
46-50 30 cm
Safety pin
No. 18 Los Angeles - Version 2
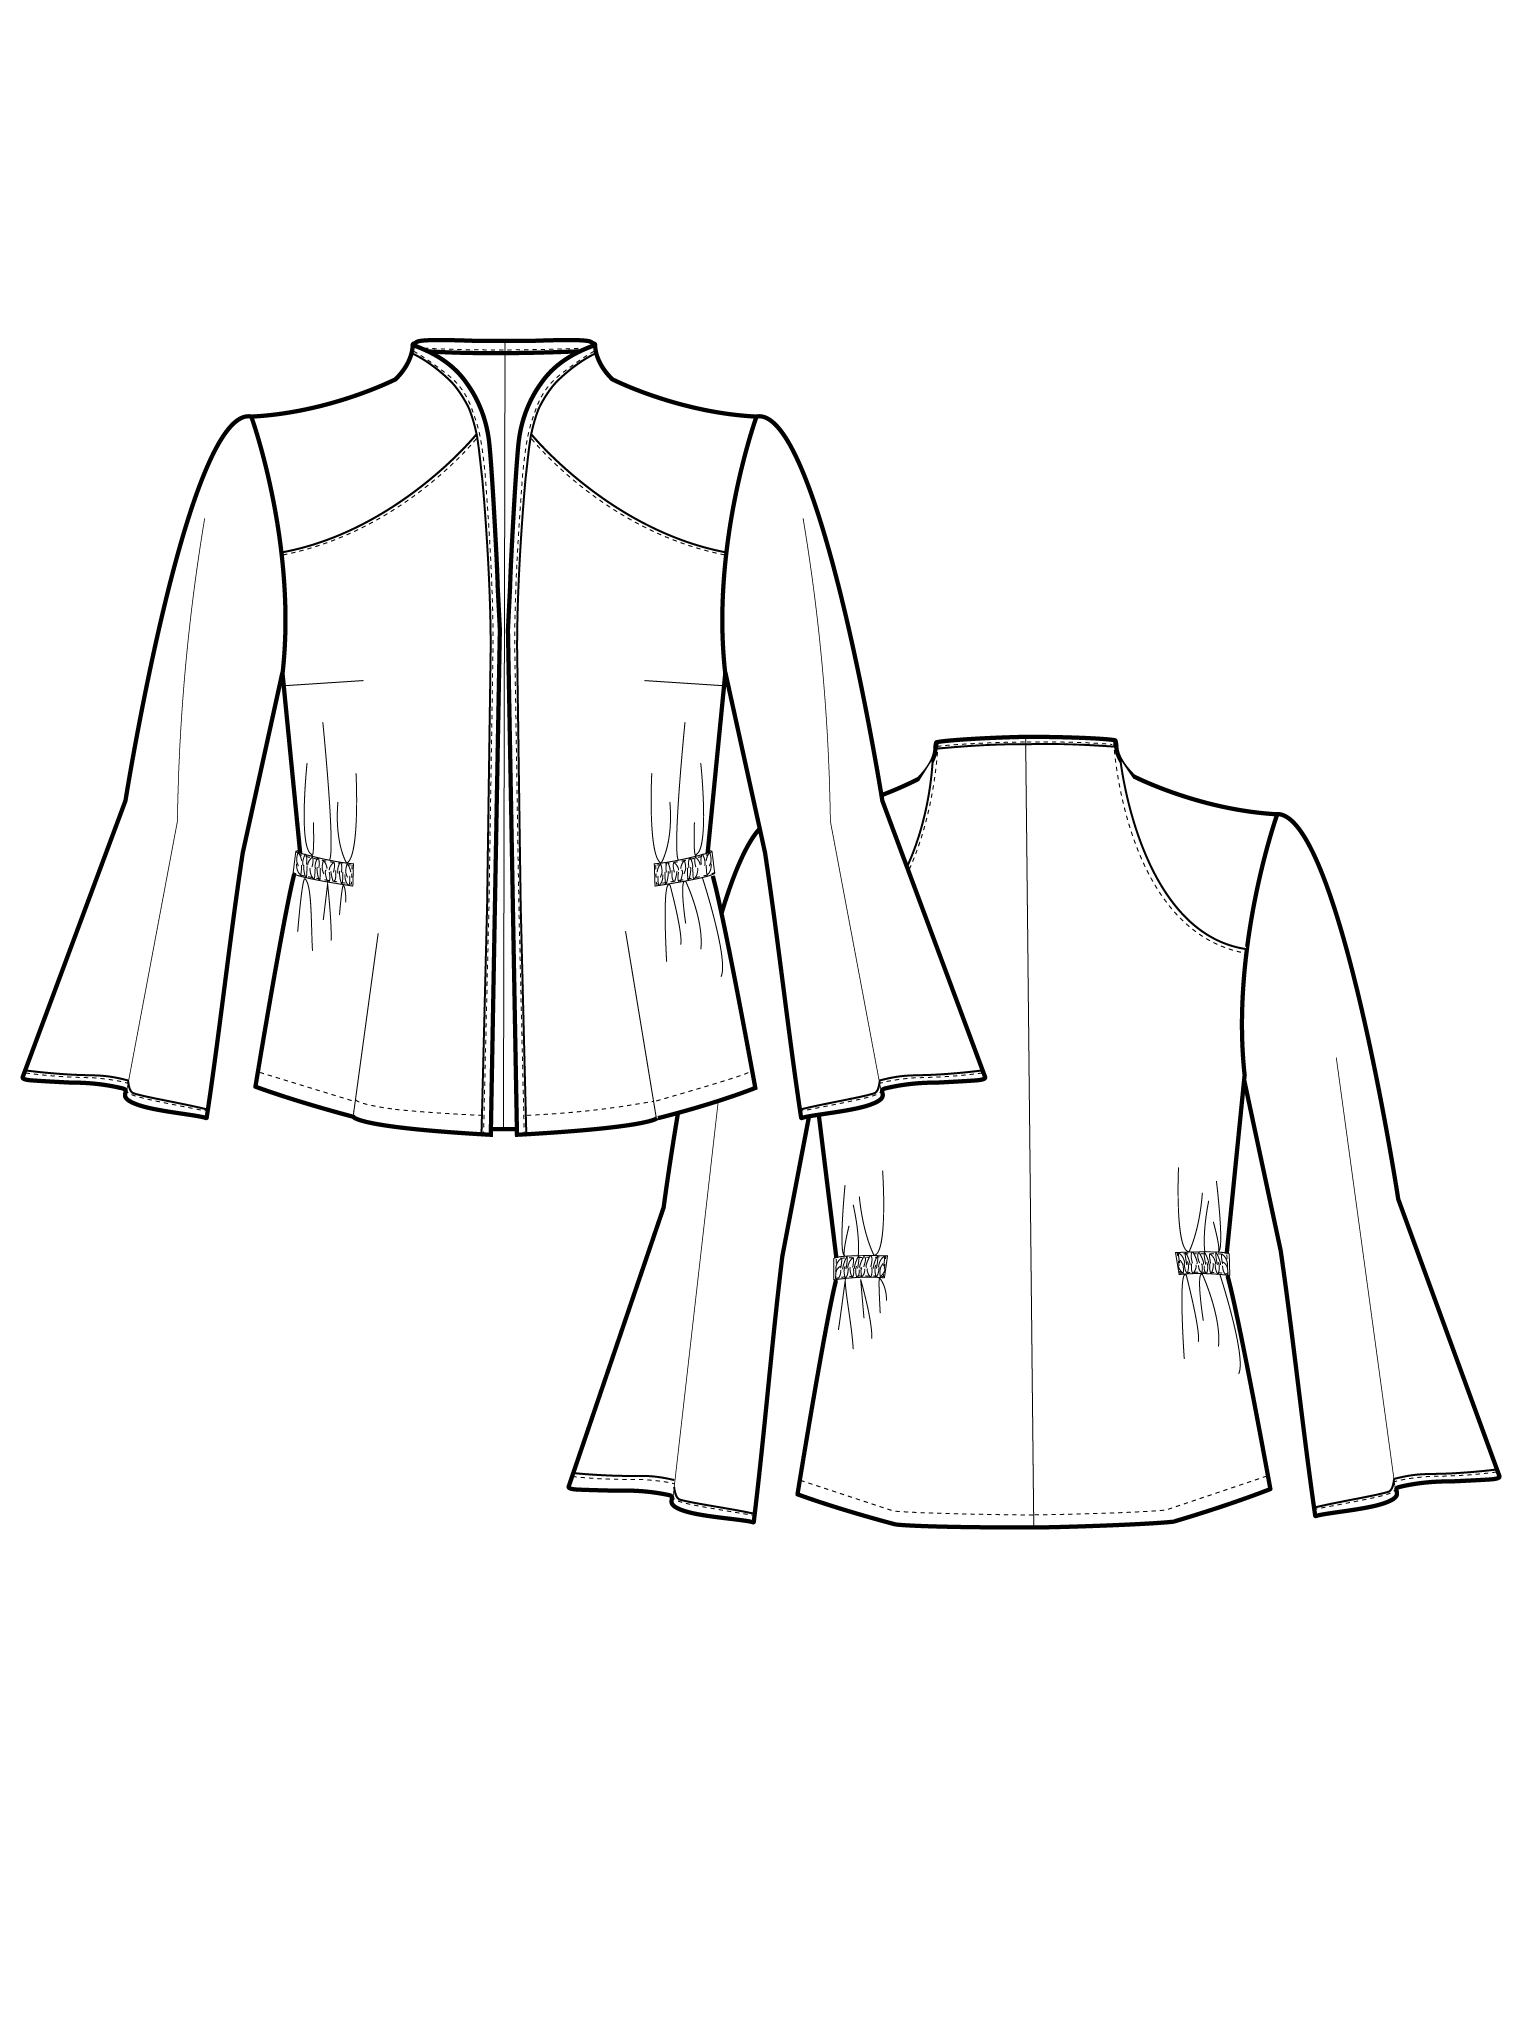
Jacket with wadded shoulders and elastic band in the waist. The sleeves are bell-shaped and cut on the bias for more comfort and flexibility. The jacket has a built-up neckline, and all edges are finished with a bias band.
Fabric choice:
Light to medium weight woven fabric. Cotton, Silk, Wool, Viscose, Cupro, Linen or Polyester. Works well in fabrics with comfort stretch. Not suitable for jersey.
Find Your Size:
Take your measurements and choose the closest size from the measurement chart see measurement chart here
Fitting:
We recommend that you always make a muslin (also known as a toile) before you cut the fashion fabric. This will ensure your finished style fits you perfectly.
Cutting Fabric
Match the lettered pattern pieces (A, B, C etc.) to the cutting layout plan for the view you have chosen.
NB! Find the length for the bias tape in the measurement chart below.
Sewing
NB! THE PATTERN HAS 1 CM SEAM ALLOWANCES INCLUDED UNLESS OTHERWISE NOTED.
1. Cut out all pieces in fabric
NB!
2. Cut pattern piece C & H on the bias
3. Sew the bust dart, right sides together. Press the seam up.
4. Layer the fabric and batting pieces for pieces D and E.
5. Overlock:
· CB- seam
· All side seams
· The long sleeve seams
6. Sew the sleeve seam, right sides together.
7. Sew CB seam, right sides together.
8. Sew the side seam, right sides together.
9. Press all seams open.
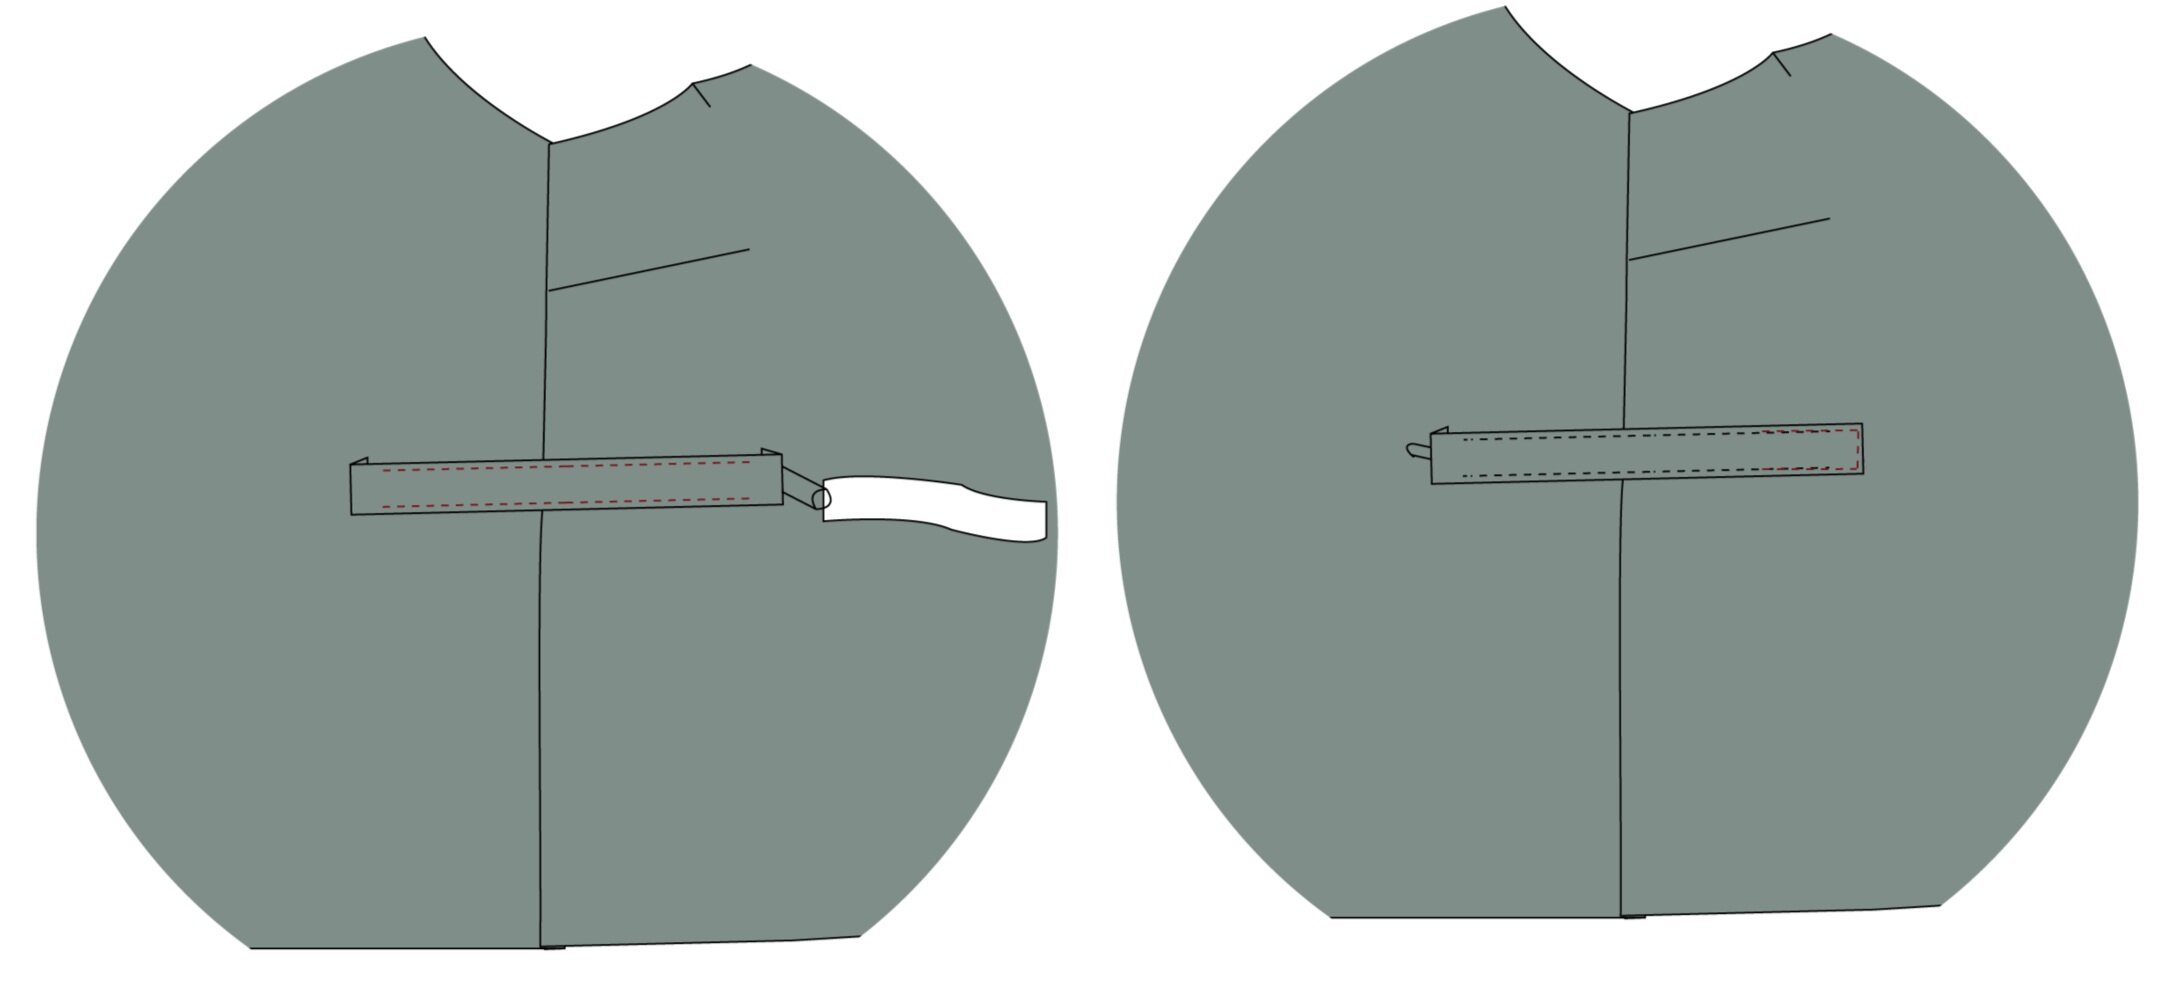
10. Fold the edges of the waistband (F) over 1 cm and press, with wrong sides together.
11. Place the waistband on the right side of the jacket in line with the markings from on the pattern.
12. Sew the waistband to the jacket with a topstitch 0.2 cm from the edge. Stop the stitch 2 cm from the ends, do not backstitch.
13. Attach a safety pin to the end of the elastic and pull it through the waistband. Leave the safety pin in the elastic.
14. Place the end of the elastic, the one with no safety pin, under the seam allowance at the end of the waistband. Top stitch from the first stitch you made to complete that end of the waistband, securing the elastic.
15. Now pull through the elastic with the safety pin, remove the safety pin and finish the elastic the same way you did at the other end.
Assemble the jacket
16. Place the front yoke batting in sandwich between the front yoke fabric – do the same for the back yoke
17. Sew the front shoulder-yoke to the front piece. Right sides together
18. Sew the back shoulder-yoke to the front piece. Right sides together
19. Sew the shoulder seam, right side together.
20. Overlock the shoulder seam, press towards the front.
21. Overlock the seam at front-yoke, press down.
22. Overlock the seam at back-yoke, press down.
23. Sew a topstitch on the front 0.2 cm along the yoke seam.
24. Sew a topstitch on the back 0.2 cm along the yoke seam.
25. Sew the sleeves to the jacket, right sides together.
26. Overlock the armscye
27. Overlock the bottom of the jacket.
28. Sew the bias band to the front edge of the jacket – see a guide online.
· Place the right side of the bias band to the wrong side of the jacket.
· Sew with a seam allowance of 0.7 cm – press the bias band out.
· Fold the raw edge of the bias band to the raw edge of the jacket.
· Fold the bias band around the edge of the jacket.
· Topstitch the bias binding in place, 0.2 cm from the edge.
Sew the bias band to the sleeve
29. Cut bias binding the same length + seam allowance. As sleeve
30. Sew the bias band to the sleeve the same way as the jacket.
31. Hem the jacket with 2 cm.
32. Make buttonholes and sew on buttons.


